Decorate every corner of your home with easy crafts for Christmas. With these simple ideas, you are sure to find inspiration. These projects are so easy that you can definitely share them with the little ones in the house. There are endless easy Christmas crafts. It doesn’t matter if you are not a DIY expert. What is really important is the experience and sharing your projects with family and friends. And of course, also seeing your home decorated with elements made by yourself. Without a doubt that gives much more satisfaction.
Easy Crafts – Snow Globe
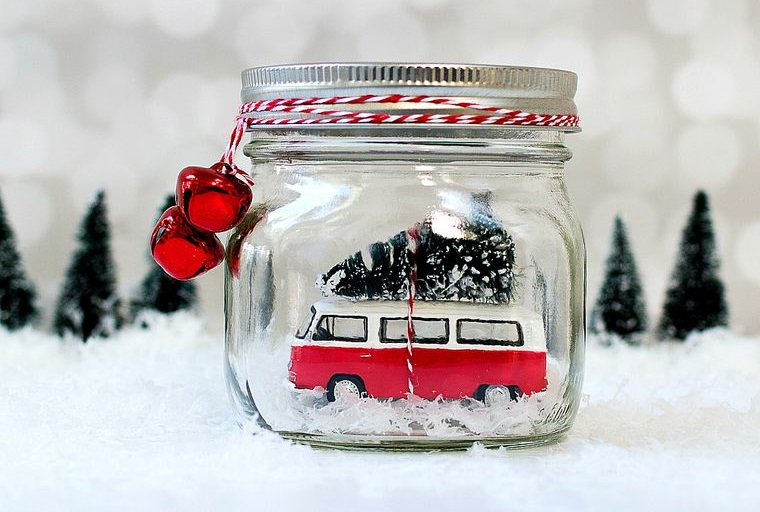
The materials you will need will be the mason jar, red bells of 20 millimeters. Red and white baker’s twine a mini bottle brush tree. A toy car and fake snow. Tie the baker’s twine around the lid of the mason jar. Then feed the ends through the top of the bells, knot, and cut off the excess thread. Now cut the base of the bottle brush which will be your mini Christmas tree. Wrap the baker’s twine around the toy cart and tie a knot at the bottom to keep it in place. Now place the tree on top of the cart and tie it, knot, and cut the excess thread. It is time to add the artificial snow to the bottom of the mason jar and insert the toy cart and cover the jar.
Easy Crafts – Glowing Candles
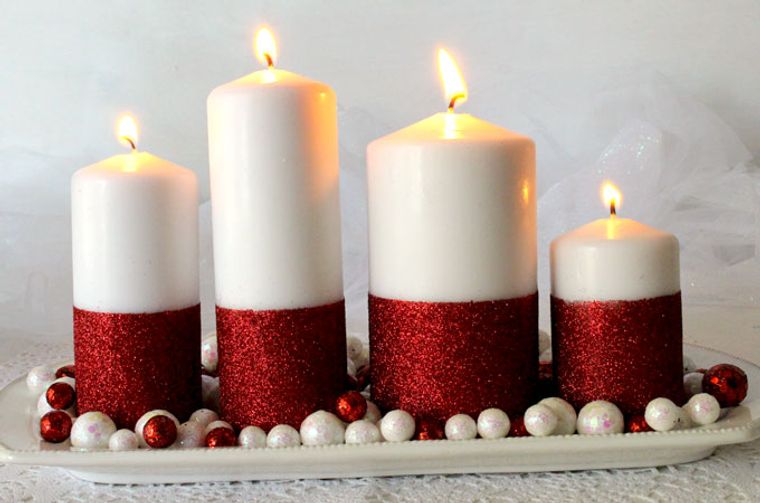
You will need a set of simple candles, glitter in red, or whatever color you want. Mod Podge, craft brush, clear sealer spray, and painter’s tape. Now, using a craft brush, paint a layer of Mod Podge on the area you want to cover with glitter. Then spread the glitter over the candle until all of the Mod Podge is covered. Let the candles dry overnight preferably. The next day, lightly mist with Mod Podge Clear Sealer Spray to keep the glitter from falling off and last much longer.
Easy Crafts – Nordic Sweater Trees
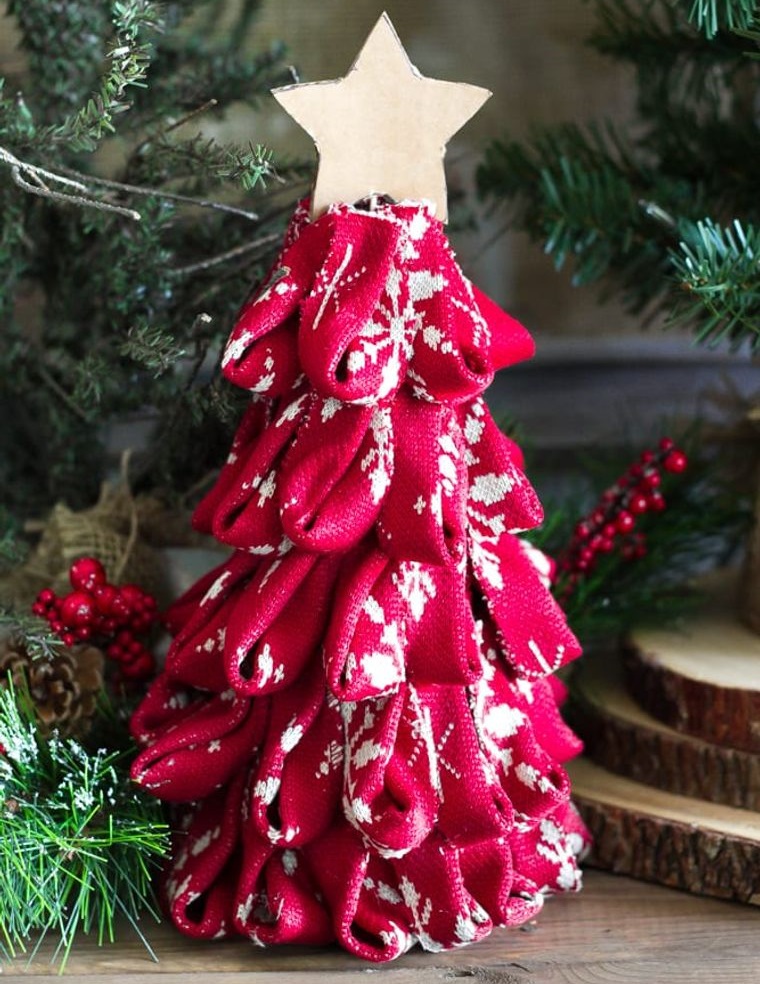
For this project, you will need a florist foam cone, Nordic printing tape. Although you can use any wide tape you want. Hot glue gun and glue sticks, scissors. A small piece of cardboard, star-shaped cookie cutter. Pen or pencil and toothpick. We recommend that you start by cutting about 12 centimeters long from the ribbon with the help of your scissors. Then cut that piece of tape in three.
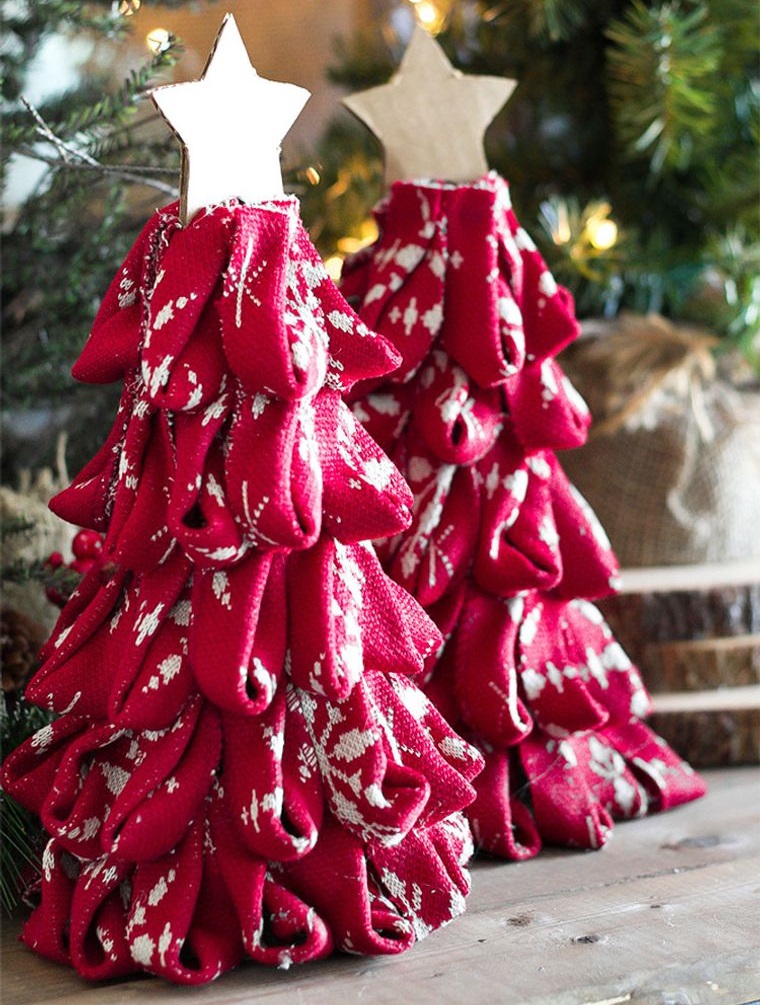
Now take a piece and fold it like a loop and secure it with a point of glue. Now start placing it in the foam cone from the base up. Place hot glue and go gluing your loops pressing a little to secure them well. Do it in rows until the cone is covered. For the star, use the cookie cutter and trace the shape on the piece of cardboard. Cut it, stick a toothpick in the lower part with which you are going to fix the star to the cone.
Easy Crafts – Mistletoe Ball for Christmas Kisses
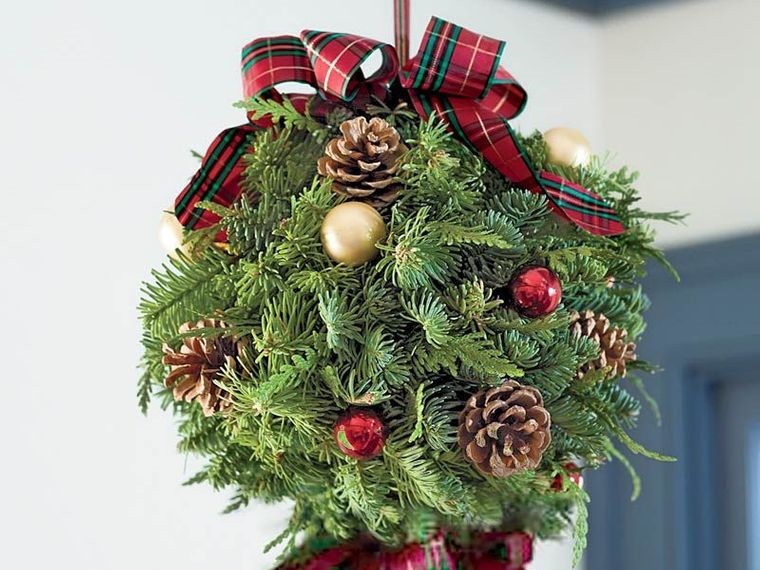
Materials are a faux evergreen kissing ball or foam sphere, 10 small selections of greenery, and berries. Ribbon, glue gun, red velvet bow, or whatever color you want. Also if you wish you can work with holly, mistletoe, and pineapples. You can start by trimming the stems of the evergreen and holly picks to fit in the kissing ball. Add hot glue to the stems and separate the branches to place the spike in the middle.
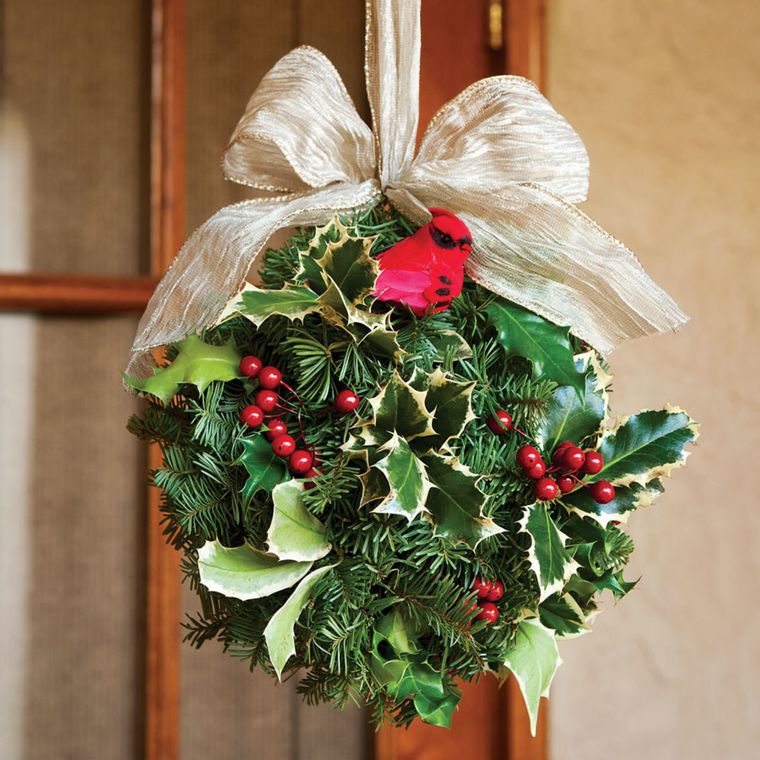
Preferably, first works with branches m to s large and fills the gaps with smaller peaks, also using the peaks m to s long dimension to add. Now decorate with red berries and pineapples if you wish and finally add a red velvet bow on top of your kissing ball. Hang it with tape to decorate the entrance or the ceiling of a room.
Easy Crafts – Rustic Wreath
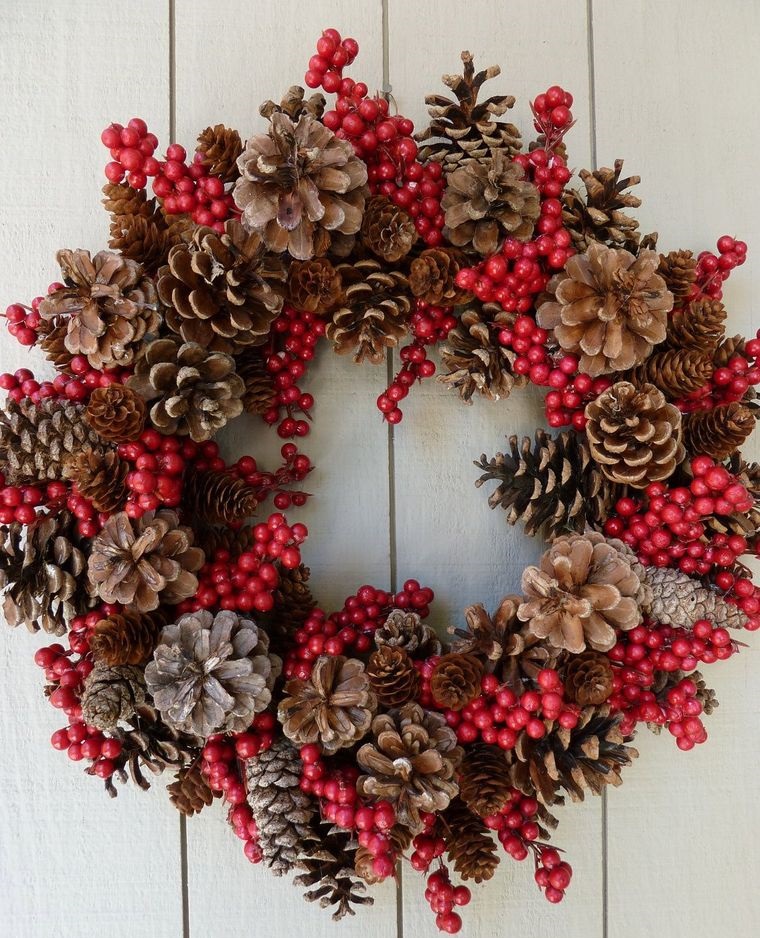
You will need pine cones in two sizes, about 20 of each. A craft wire wreath frame, wire cutters, and if you want you can use nuts, acorns, and berries. You will also need burlap, a hot glue gun, and glue sticks. Start by sorting the pine cones by size and place the largest size in the wreath frame in a circle. For each pine cone, cut about 12 inches of craft wire.
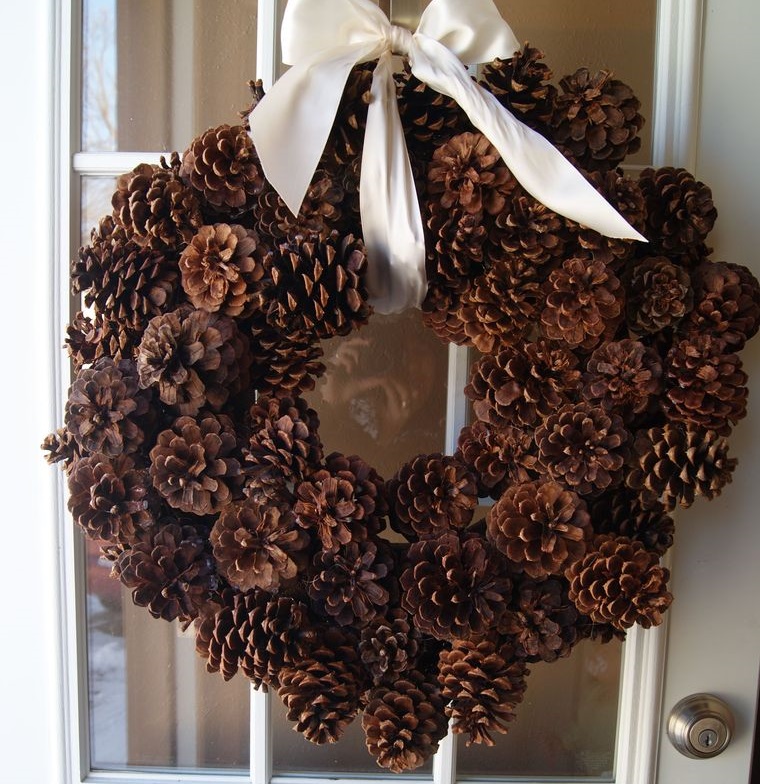
Wrap it around the base of the pine cone, wedging it into the scales so it’s not noticeable, and wraps tightly around the center of the cone. Place the pine cone on top of the wreath frame and wrap the wire around the base and trim off the excess with pliers. Continue this way, attaching the pine cones to the wreath frame until you complete the circle. Now place a circle of smaller pine cones on the inside of the wreath.
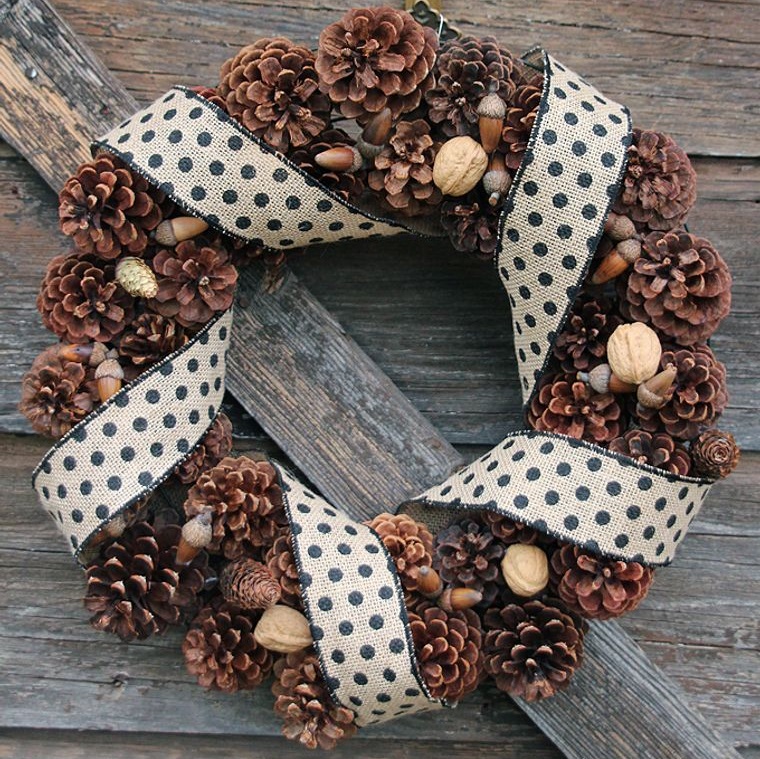
You can secure them with wire and place a little glue where the smaller cones meet the larger ones. Now gather other natural elements like acorns, nuts, seeds of different shapes, and burlap ribbons. Use hot-glue to secure the acorns and so on, filling in the gaps. If you want, you can wrap a wide ribbon around the entire crown and secure the ends at the back with hot glue. To hang it, use a small loop of craft wire around the top of the wreath frame.
Easy Crafts – Wrapping Paper Crown
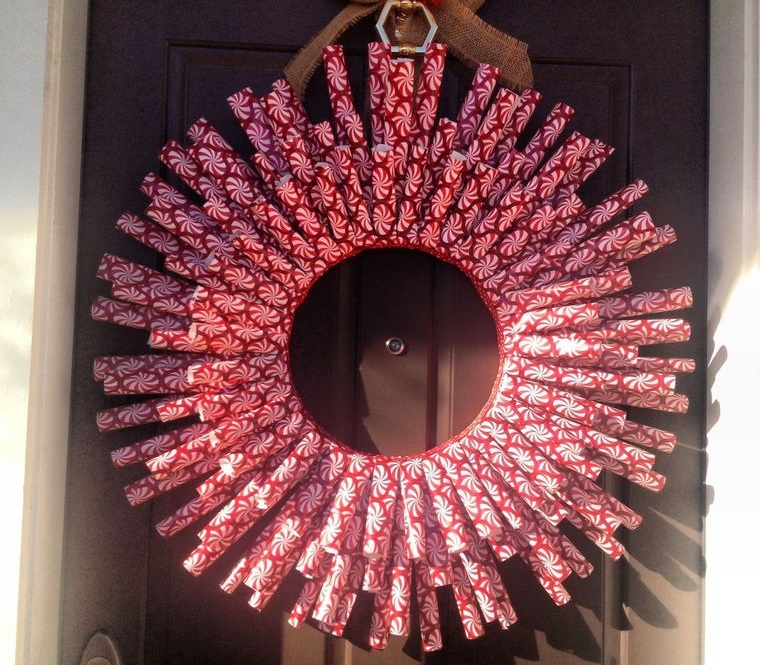
You will need a 12-inch foam wreath, two meters of sturdy wrapping paper, the thicker the better. Also hot glue, invisible tape, and hanging tape. The first thing to do is tie a ribbon around one section, as you will be placing paper tubes on top. Now cut a long 8-inch strip from the wrapping paper roll and then into 2-inch strips from that same section. Wrap them up and secure them with tape, then glue them in layers to form the crown. Continue the process with three layers, shortening the paper tubes on the inner circle. This is actually an interesting project, hang your crown where it will surely attract a lot of attention.
Easy Crafts – Paper Candle Christmas Tree Ornament
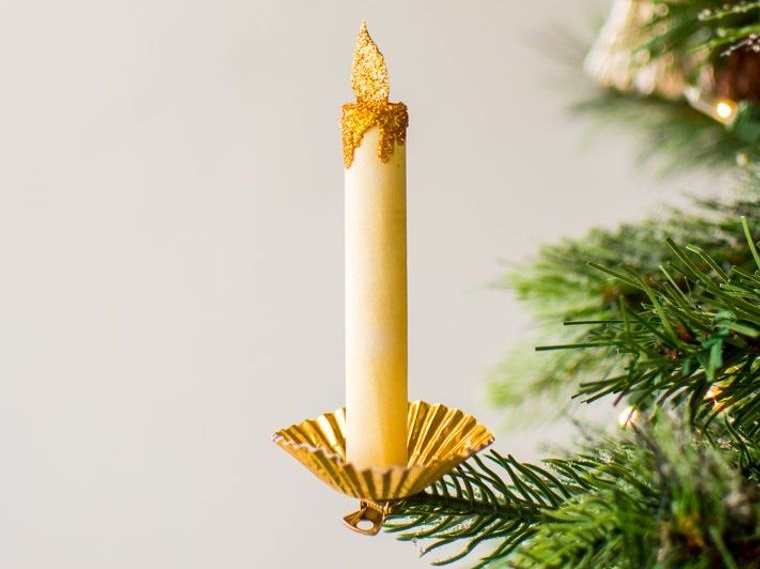
You will need small copper or gold-colored baking cups, the yellow wallpaper, and textured if desired. Fine glitter in gold and copper, Glue stick and gun and gold clips. Cut out pieces of paper measuring two by three inches for the body of the candle. Roll the sheet of paper lengthwise and glue it with hot glue, forming a tube. Now cut a small circle large enough to cover one end of the paper tube and glue it down by dropping some of that glue as if it were melted wax.
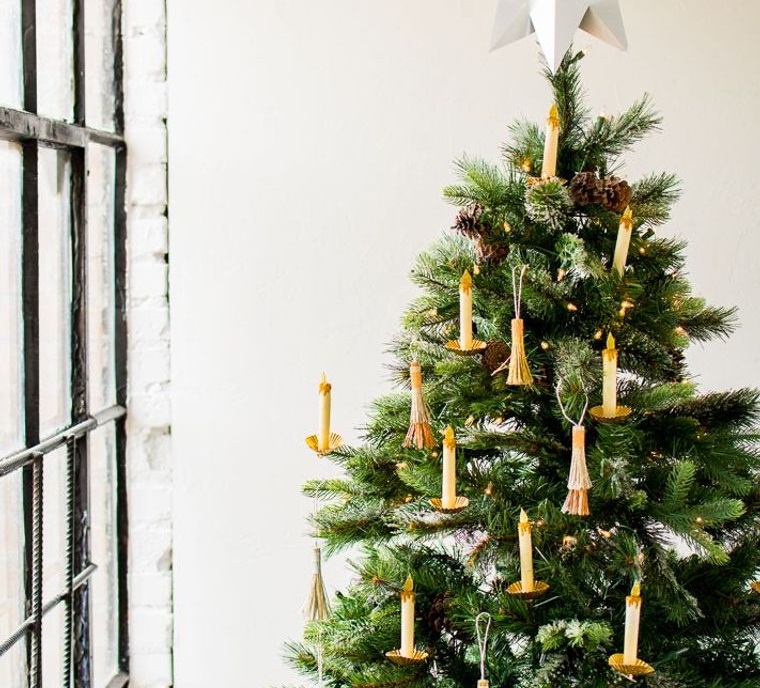
Then cut a small candle flame from the paper and cover the top of the tube with glue and glitter. Then take two baking cups and flip one of them upside down. Apply glue to the inside of one baking cup and place the other inside so that both sides of the cup have copper shine. Now stick the candle inside the baking cup. Then glue a paperclip to the bottom of the baking cup to attach it to your Christmas tree.
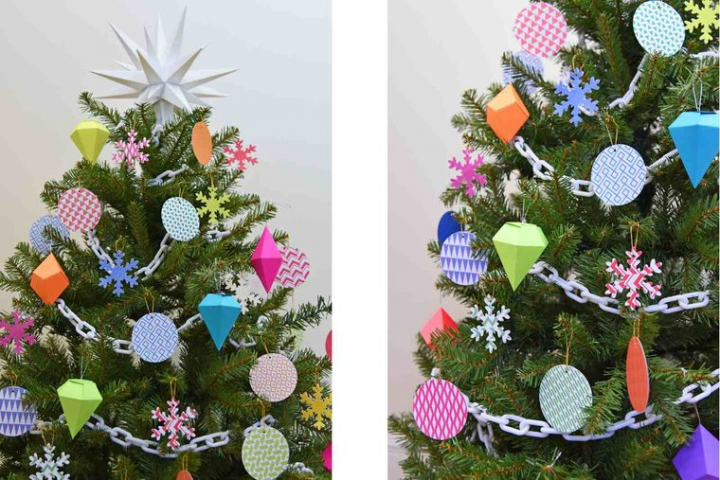
Easy Crafts – Festive Paper Garland
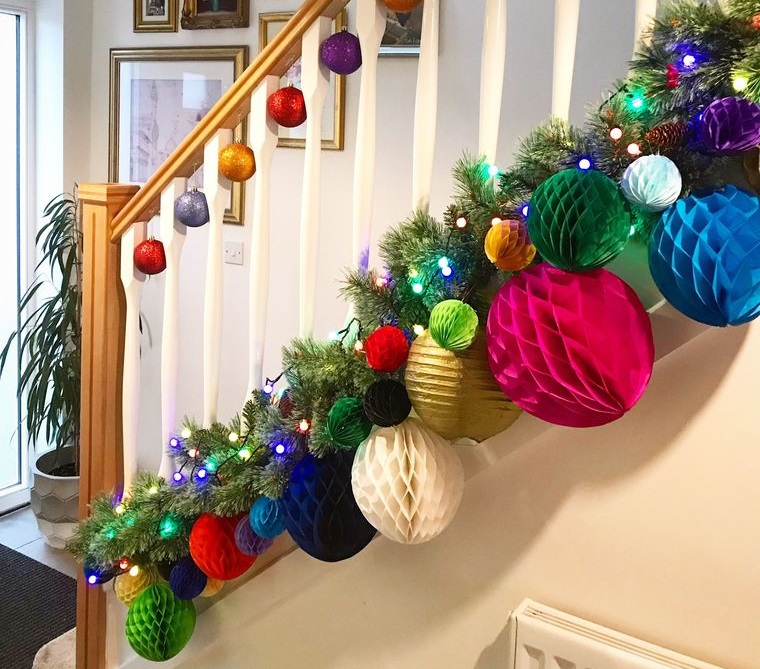
The materials are simple. You will only need 3D paper shapes, fishing lines, ribbons, and crepe paper. Select four or five 3D paper shapes in three or four colors. You can use gray diamonds, white balloons, snowflakes, and gold and silver pompoms, for example. With the shapes unfolded in their 3D shape, attach each one to the outside of your stair railing with a fishing line, placing larger shapes towards the steps. Then wrap pieces of tape and crepe paper around the railing and bridge post to add a seamless texture.
Easy Crafts – Mason Jar Christmas Centerpiece
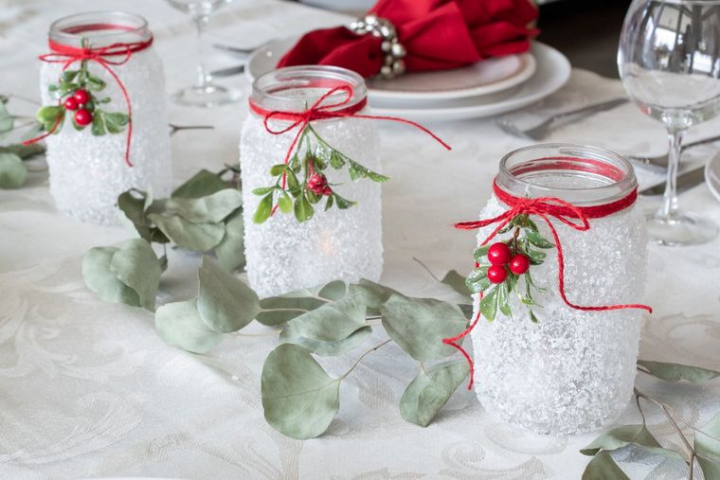
You should have three mason jars, glue, Epsom salt, glitter. Also red velvet ribbon or any other color you want and also optional green branches. We want to point out that of course some of the salt may fall off if the jars are moved too much. But you can apply a thin layer of glue over the spots that look a little thin and sprinkle in more Epsom salt. Something that will also help the jars shine when some of the salt drips are the glitter. You can use equal parts salt and glitter.
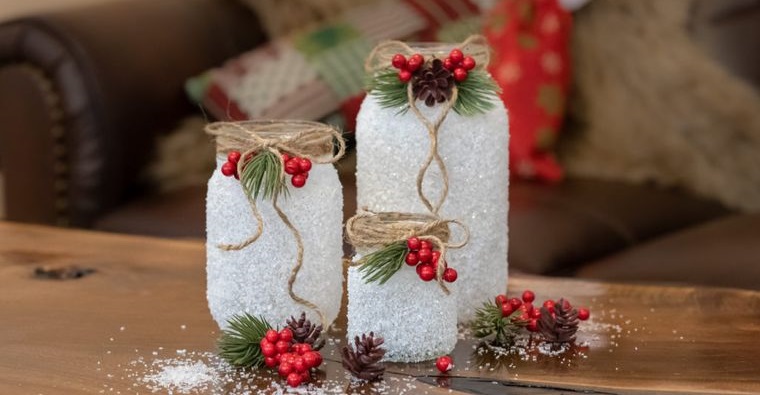
Once you’ve applied the glue and it’s dry, you can spray a sealer over the jars to help the Epsom salt fall off a bit more. You should also be aware that if the glue is applied too thick, the Epsom salt can run off the jar before it is completely dry. Well, in a small bowl, combine half a cup of glitter with half a cup of Epsom salt. Brush a thin layer of glue around the glass jar. Sprinkle the glitter Epsom salt mixture over the glue and place it on a covered surface to dry.

Let it dry completely for about 12 to 24 hours before decorating. Once dry, tie a bow around the mouth of the jar with a festive ribbon. Also if you prefer you can add a tealight inside the jar. In the same way, you can fill them with vegetation and red fruits, either fake or real. Now place them on a wooden tray and decorate with real evergreen branches. You can also add a bit more sparkle by weaving a string of lights under the greenery to make it stand out even more.
Easy Crafts – Marble Ornaments
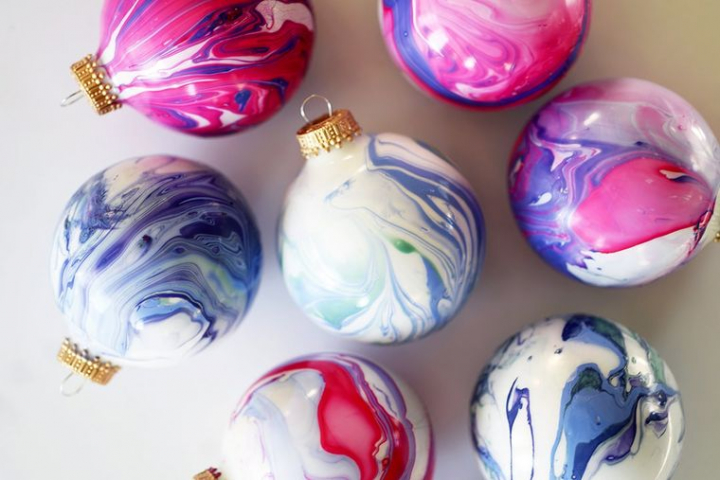
This may be one of the easiest projects with fewer materials. You only need nail polish of the color you want, a little water, and a wooden skewer stick. And of course, the Christmas decorations that you want to transform. Stir some water into the ornaments. Not much, plus or minus a tablespoon, and then throw it out completely. Now pour nail polish into the ornament. You can use wooden skewer sticks to help move it to different areas of the ornament before you start making the marble.
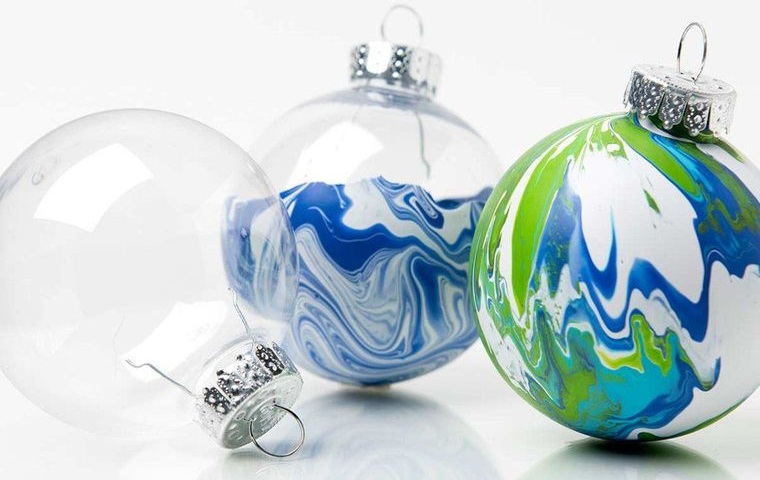
One of the easiest ways to do the marble effect is by tapping the ornament against your hand in a gentle, circular motion. Make sure to keep the opening closed with your finger and a paper towel. Once the entire interior of the ornament is covered, place it in a container for 24 hours with the opening facing up. After that time you will have to turn the ornament to different sides several times to verify that the paint does not settle in one area or that it is already completely dry.
Beautiful Christmas tree decoration with paper decorations
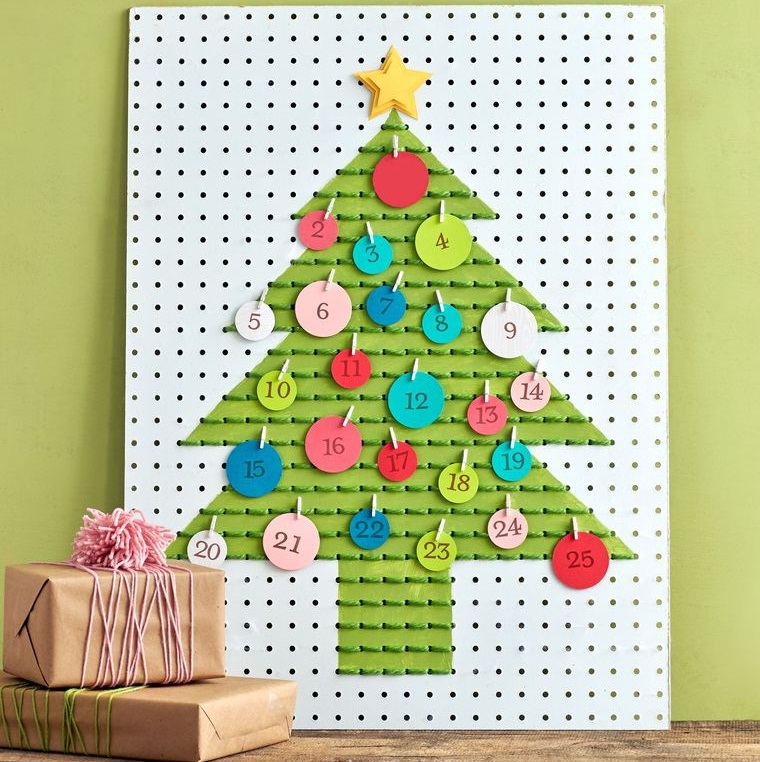
Mini tree as an advent calendar on a shelf
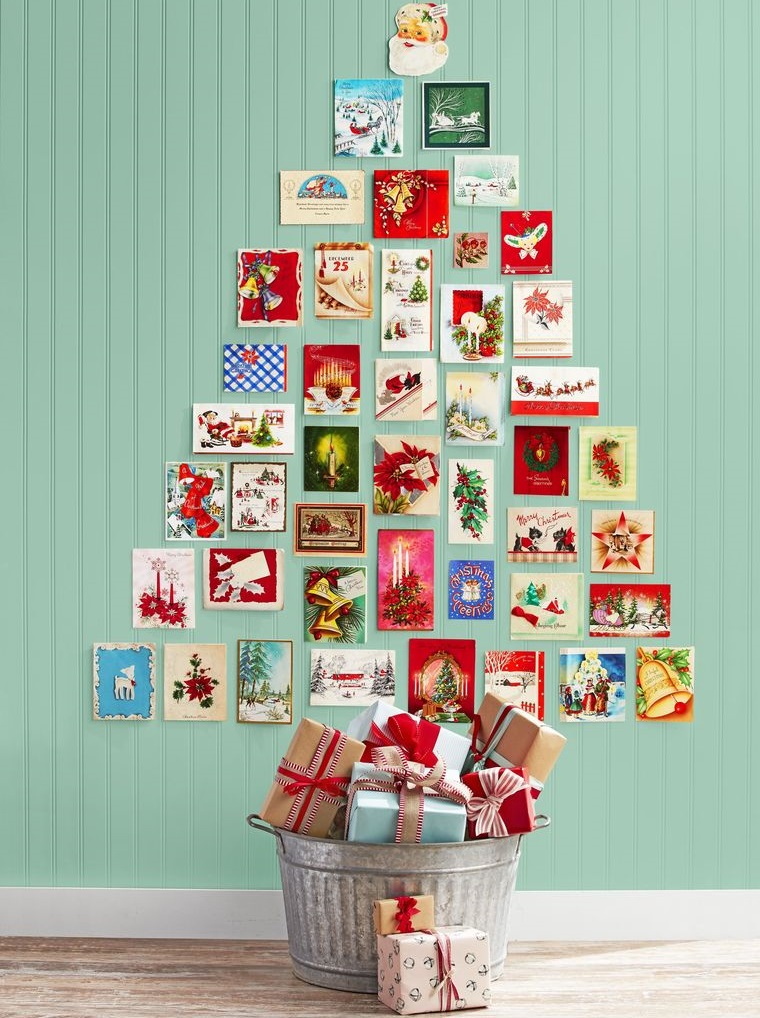
Christmas tree made with Christmas cards on the wall
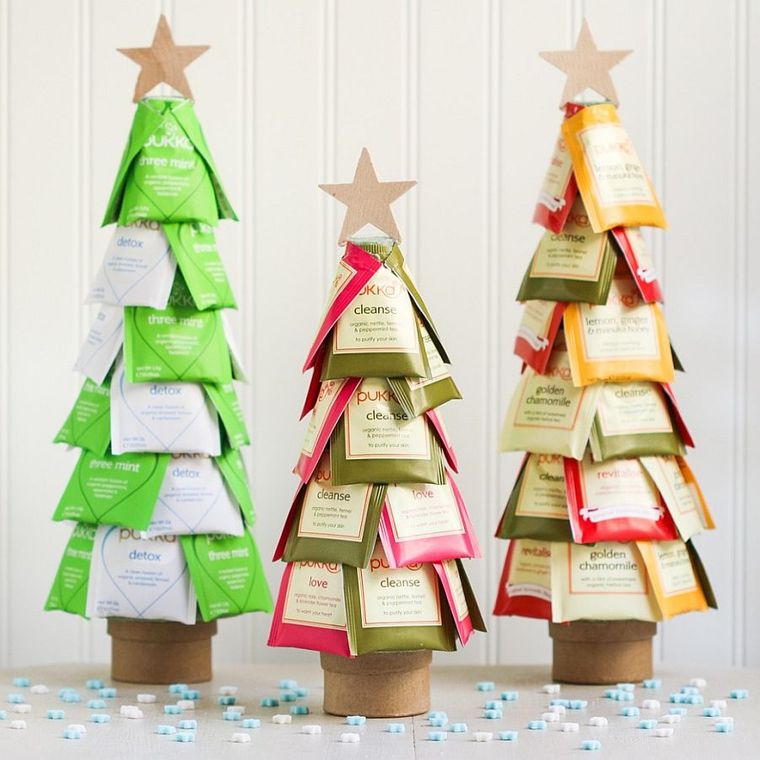
Cool mini trees with tea bags
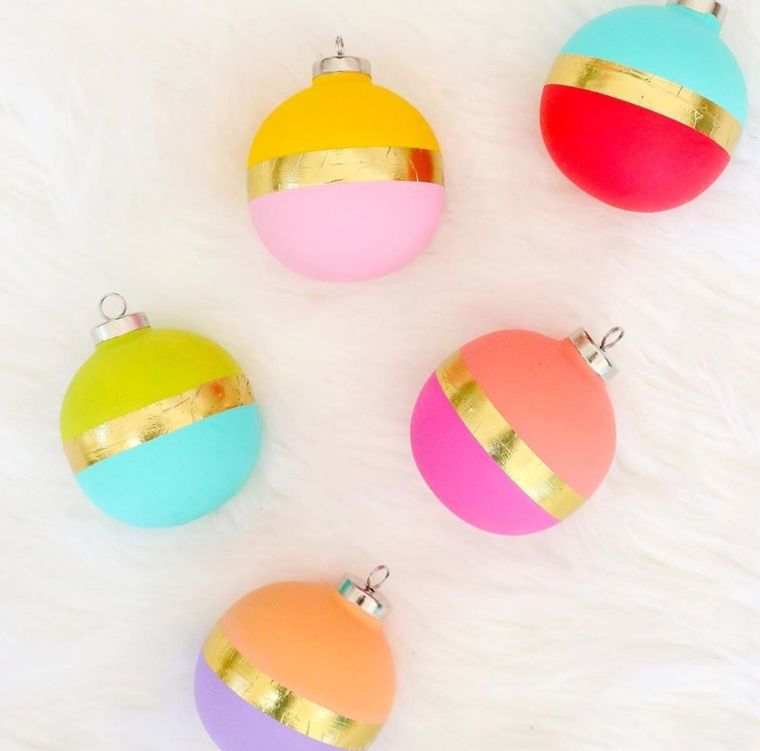
Personalized Christmas balls with cheerful colors
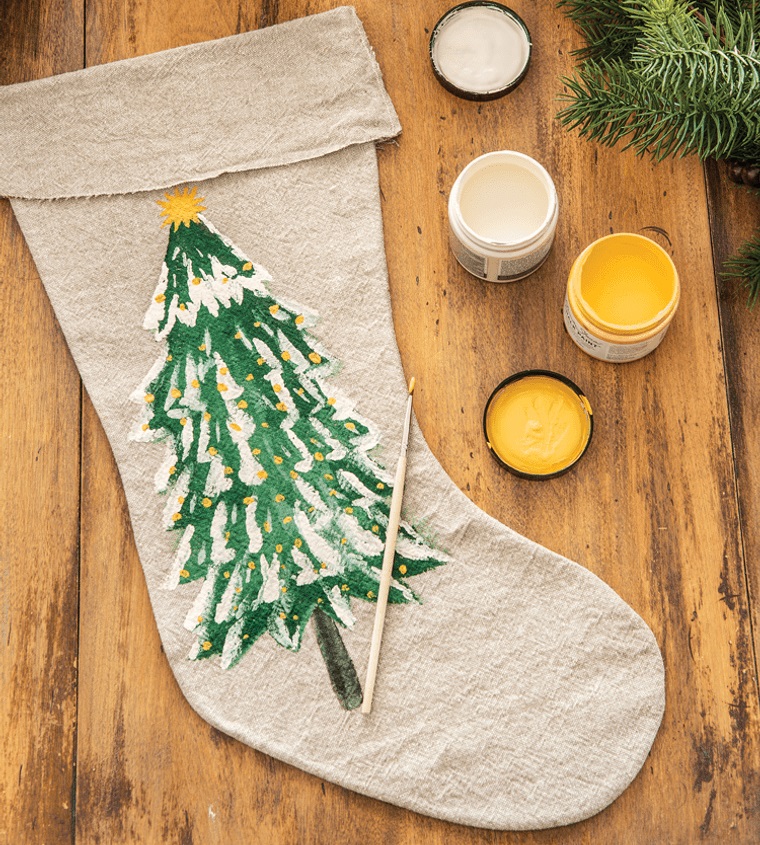
Hand Painted DIY Christmas Stocking
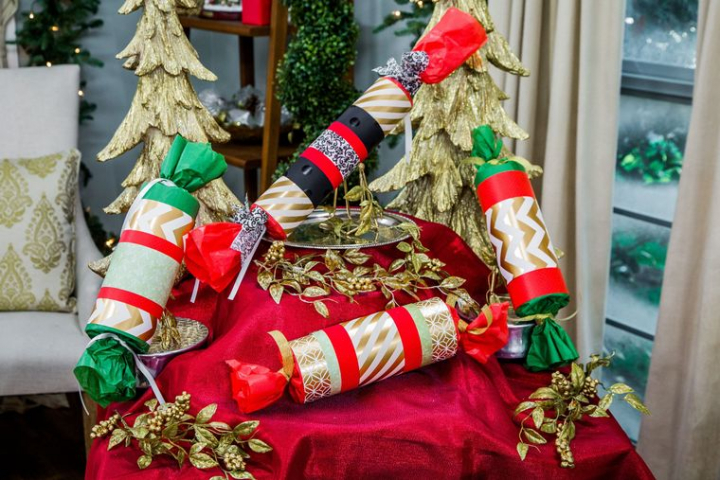
Jolly Christmas Decorations with DIY Giant Candies